📸 Job Photos
Document the work with before/after photos — great for records, disputes, and insurance.
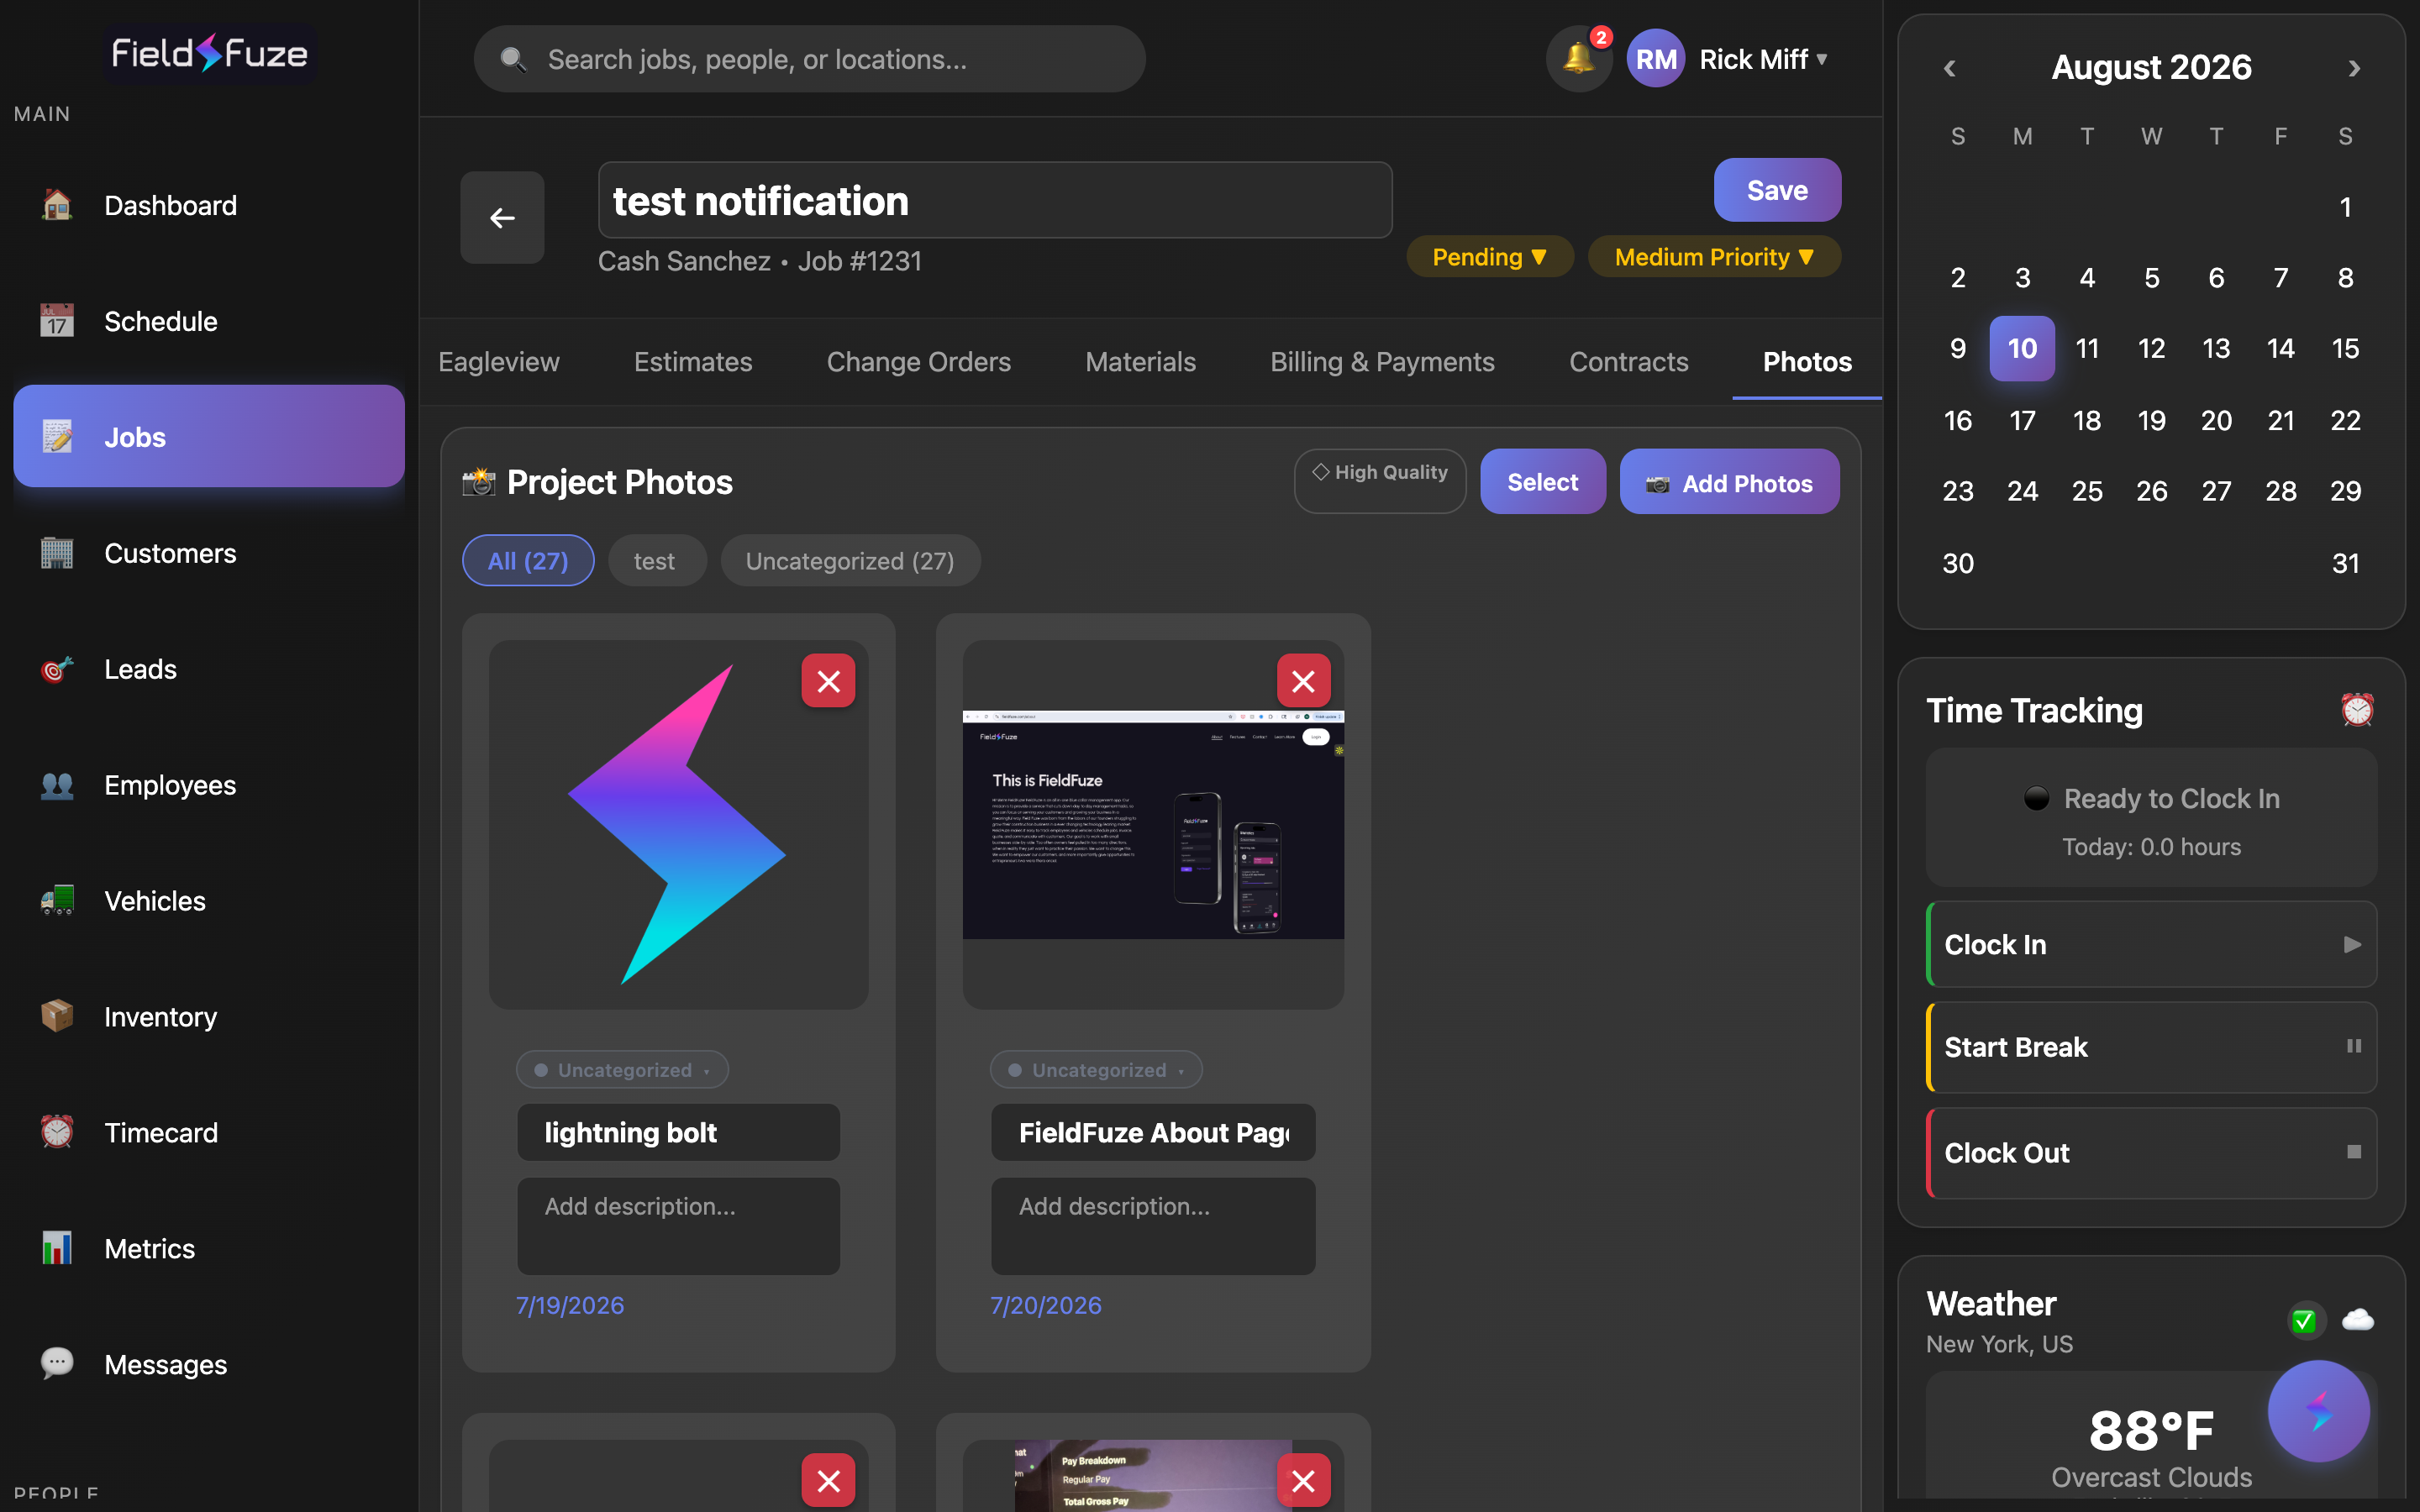
Every job has a Photos tab with its own gallery. It's built for the field: snap or drop in as many shots as you like, sort them by stage of the work, add a note to each, and pull them straight into estimates, invoices, and customer emails. Photos are stored with the job, so anyone on the team who opens that job sees the same up-to-date gallery.
Adding photos
Click 📷 Add Photos at the top of the tab to bring photos in. FieldFuze meets you wherever you are:
- In the mobile app — choose Take Photos to open the in-app camera and capture a whole batch back-to-back without leaving FieldFuze, or Upload from Library to pick existing shots from your device.
- On the web — + Add Photos opens your computer's file picker so you can select one or many images at once.
- Drag and drop — on the web, drag image files straight from your desktop or a folder onto the Photos tab. A "Drop photos here" overlay confirms the drop zone.
- Paste — on the web, copy an image (for example a screenshot) and paste it right into the Photos tab with your normal paste shortcut. It's added instantly.
You can bring in up to 50 photos in a single batch, and repeat as often as you need — there's no cap on how many a job holds overall. Each upload processes in the background, so you can keep working while photos finish uploading; a status indicator keeps you posted, and a ghost thumbnail marks any that are still coming across.
New photos arrive as Uncategorized so nothing slows you down in the field. When you add a batch on mobile, FieldFuze offers a quick Categorize Photos step to tag the whole set at once — or tap Skip and sort them later back at the office.
Organize with categories
Categories keep a job's photos tidy and make before/after storytelling effortless. FieldFuze ships with a sensible default set, and you can tailor it to how your crews work.
- Before Work — the site before you start (great for baseline and dispute protection).
- During Work — progress shots that show what you did along the way.
- Completion — the finished result, perfect for the after half of a before/after.
- Uncategorized — the landing spot for fresh photos until you sort them.
- Inspection — an extra category that appears automatically on insurance jobs, so adjuster-ready documentation has its own bucket.
- Your own categories — add custom categories with their own colors that then appear on every job's Photos tab.
Create your own photo categories
- Go to Organization Settings → Operations → Photo Categories.
- Add each category you want with a name and a color — for example "Materials," "Permit," or "Equipment."
- Save. Your categories now show up in the filter bar and the per-photo picker across every job, alongside Uncategorized.
Set or change a photo's category
- On any photo tile, tap the category badge to open the picker.
- Choose the category — the badge takes on that category's color, and the change saves on its own.
Filter and find
A row of category chips sits above the grid, each with a live count of how many photos it holds — for example All (24), Before Work (6), Completion (9). Tap a chip to show just that category; tap All to see everything. It's the fastest way to jump to your after shots or pull up every inspection photo at once.
Title and describe each photo
Every photo can carry its own title and description — note the room, the material, the measurement, or exactly what a shot is meant to prove. Just type into the fields under the photo; FieldFuze saves automatically as you go, and a Saved ✓ indicator confirms it. Those titles and descriptions travel with the photo into PDFs and emails, so the customer sees your captions too.
The High Quality toggle at the top of the tab lets you choose the resolution of what you upload. Standard is quick to send and looks great in customer emails; switch High Quality on for full-resolution detail — ideal for insurance documentation and detail-critical work where every shingle or seam matters. Your choice is remembered on that device, so you can set it once and forget it.
Bulk actions with Select mode
Tap Select to enter multi-select mode when you want to act on several photos at once. Check the ones you want (or use Select All / Deselect All), then choose an action:
- Categorize — assign one category to every selected photo in a single step, perfect for sorting a whole batch after a job.
- Email — send the selected photos to your customer (see below).
- Delete — remove selected photos you no longer need.
Tap Done to leave Select mode and return to the normal gallery.
Email photos to your customer
- Tap Select, choose the photos you want to share, then tap Email.
- The customer's email is pre-filled — keep it or type a different address.
- Send. FieldFuze packages the photos into a tidy ZIP download link and emails it, so even large batches deliver cleanly at full quality.
Put photos to work in estimates & invoices
Your job photos aren't just a gallery — they're proof you can hand to the customer. When you build an estimate or send its PDF, you can turn on Include Job Photos to embed the gallery right in the document, and photos attached to an approved estimate carry forward to the job automatically. Emailed estimates and invoices can bundle full-resolution photos as a download link too, so the customer gets clean, sharp images alongside the numbers.
Ways teams use the Photos tab
- Before/after documentation — categorize Before Work and Completion shots, then drop them into the estimate or a customer email to show exactly what changed.
- Insurance jobs — capture full-resolution Inspection photos with descriptions of damage and repairs, ready to package and send to the adjuster.
- Dispute protection — a timestamped baseline of the site before you start, plus progress shots, settles "it wasn't like that before" questions fast.
- Crew handoffs & records — everyone on the job sees the same gallery, so progress is visible without a group text, and the finished record lives with the job forever.