🏢 Customers
Your customer directory (CRM). Every contact, address, and relationship lives here — search a name, open a full profile, review job history and money, text the customer, and start the next job in a couple of clicks.
Customers is the hub that ties your whole account together. A record here connects to the lead it came from, every job you run for that person, the texts you exchange, and the payments and recurring plans in billing. Because it is one shared source of truth, the address you type once flows into new jobs, the phone number powers texting, and the "Sold By" credit rides all the way through to revenue reporting.
The directory
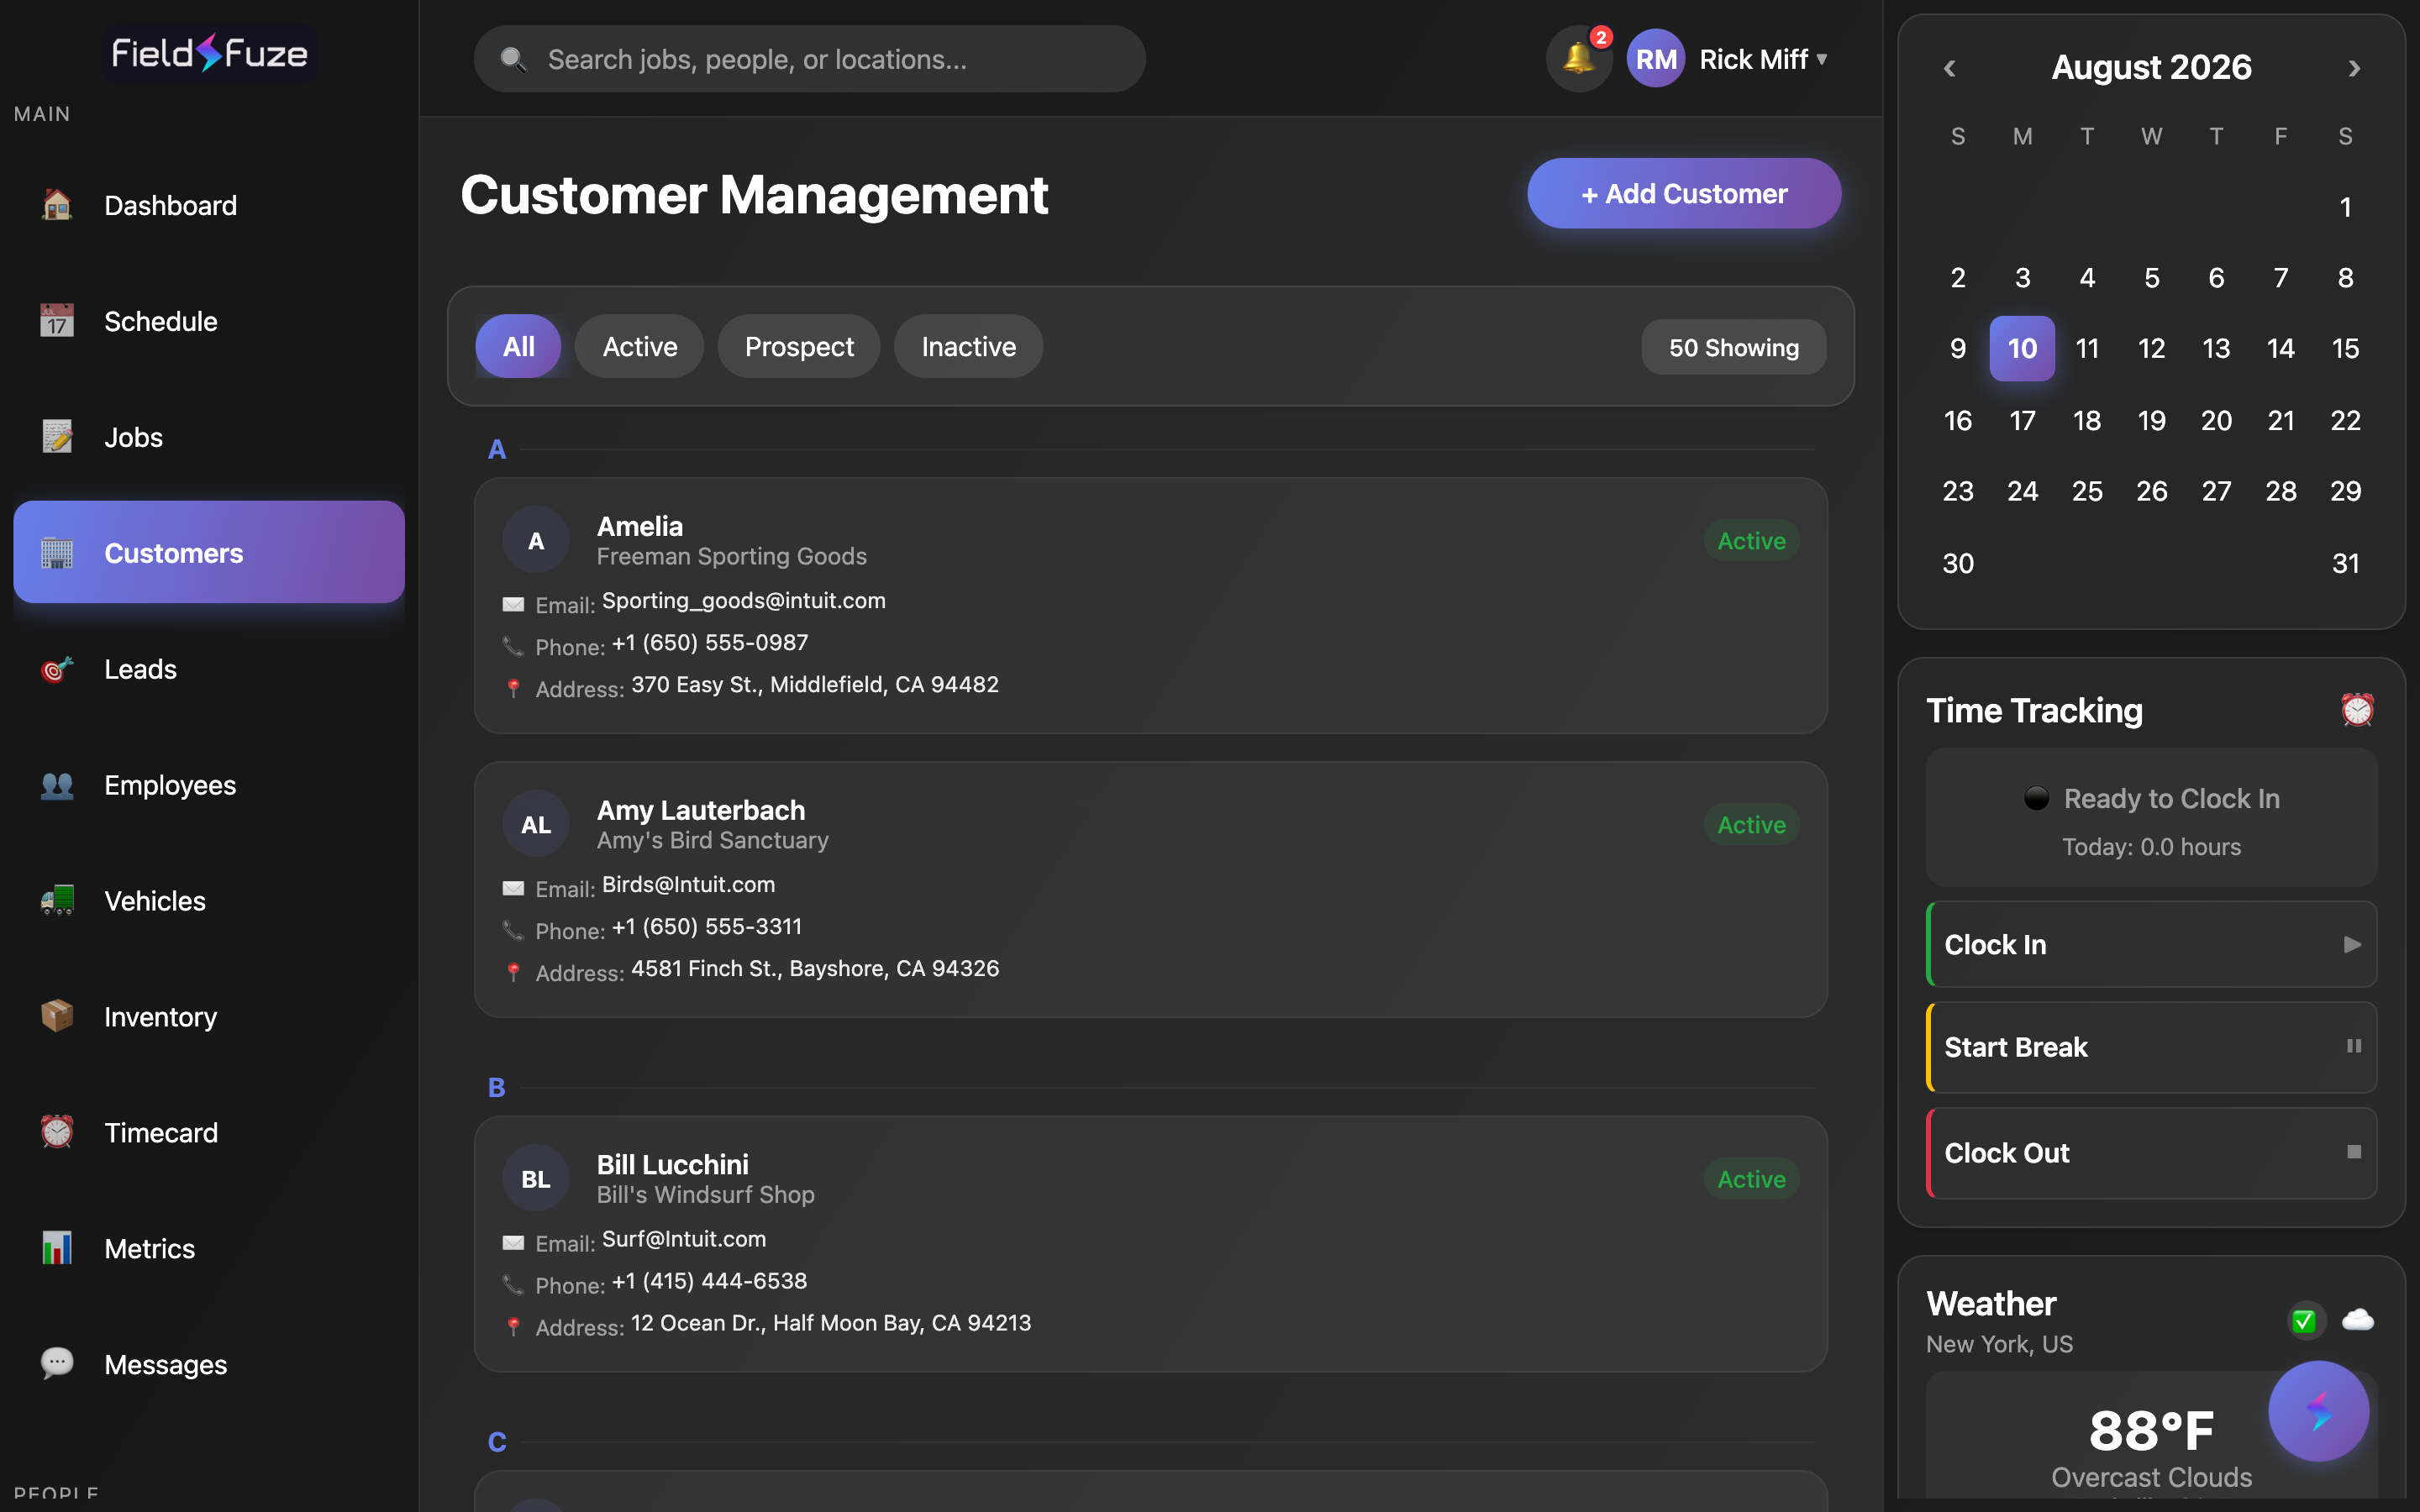
Customers are listed alphabetically and grouped by first letter, so long lists stay easy to scan. Each card shows the customer's initials, name, key contact details, and a status. A live counter at the top tells you exactly how many records match what you're looking at.
Search the directory
Type in the search box and the list narrows instantly. Search is multi-word and matches across everything that matters, so you can find people by any detail you remember.
- Name — first, last, or both.
- Email — full address or any part of it.
- Company — great for commercial and property-manager accounts.
- Phone — the number you have on file.
- Address, City, and State — find every customer on a street or in a town.
Every word has to match somewhere on the record, so a search like smith lakeland instantly narrows to the Smiths in Lakeland. Results are ranked by relevance, with the closest name matches first.
Filter by status
Use the status filters to focus the directory on the segment you care about. On desktop and tablet they appear as one-click pills across the top; on mobile they're a dropdown. The counter updates to show how many customers are in the selected group.
- All — the complete directory.
- Active — customers you're currently doing business with.
- Prospect — people you're still working to win.
- Inactive — past customers you can re-engage anytime.
Opening a customer profile
Tap any card to open the full profile. FieldFuze loads the customer's details, documents, and recent job history together so you have the whole relationship in front of you before a call or a visit.
Contact details
- Name and Company — who they are and the business they represent.
- Email and Phone — one tap dials the number; the phone also powers texting.
- Address, City, State, and Zip — the service address, ready to reuse on the next job.
If your role includes editing customers, every field is editable right in the profile — update an email or correct an address on the spot and Save. Your changes keep the record searchable immediately.
Business metrics
A quick snapshot summarizes the account: Total Jobs, the Last Job date, and the customer's Status. Total Revenue across the relationship is shown to owners and managers whose role includes full revenue visibility.
Recurring billing summary
When a customer has jobs on a recurring plan, the profile shows a live Recurring Billing card. It reads as a clean at-a-glance badge — for example $450/mo (2 active) — summing the monthly-equivalent value of every active plan for that customer. If plans are paused, it tells you how many.
- Active total — the combined monthly recurring value across all active plans, shown in green.
- Paused count — how many plans are on hold, shown in amber, ready to resume.
- Tap to manage billing — open the summary to see each recurring job, jump straight to any of them, and refresh on the spot.
Recurring billing is configured on the job, then surfaced here so the customer's whole recurring picture lives in one place. Amounts include the platform processing fee so the number matches what the customer is actually charged. See billing for the full payment and plan tools.
Customer documents
Keep the paperwork that belongs to a customer attached to their record — contracts, signed estimates, permits, warranty sheets, before-and-after photos, and more. Each document shows its type icon and upload date, and opens with a tap.
Upload a document
- Open the customer and go to Documents.
- Click + Upload Document and choose a file.
- It's saved to this customer and available to your team.
- PDFs and Office files — PDF, Word (.doc/.docx), Excel (.xls/.xlsx), plain text, and CSV.
- Images — JPG, PNG, GIF, WebP, and BMP for job photos and signed docs.
Notes
Every profile has a free-form Notes field for gate codes, pets, preferred crew, access instructions, or anything the whole team should know. Notes save with the record and travel with the customer.
Job History
The profile lists this customer's jobs newest-first, each as a tile you can open in one tap to jump straight into the job. The heading shows how many are displayed out of the total (e.g. 10 of 27 shown), and a Show All button loads the rest whenever you want the full timeline.
- Title, date, time, and location — the essentials for each job at a glance.
- Status badge — Active, Completed, or Pending, color-coded for a fast read.
- Stage badge — for multi-stage jobs, see progress like Stage 2/4 without opening the job.
- QuickBooks badge — jobs brought in from QuickBooks (once connected) are clearly marked as QB Import.
- Money at a glance — each tile shows exactly where the job stands: an amount due in amber (with the amount already paid beside it), a clean paid in green when settled, or a credit when the customer has overpaid.
- Assigned tech — who's on the job.
The paid/due figures come straight from the job's stored totals — estimates, change orders, and processing fees included — so the numbers on the tile match the numbers in billing.
Start a job from the profile
The fastest way to book work is right from the customer you're already looking at. FieldFuze pre-fills the new job with the customer's name and service address so you're ready to schedule in seconds.
- Open the customer.
- Click + Add Job at the top of Job History (or Add your first job if it's a brand-new customer).
- The job opens pre-linked to this customer with their address filled in — add the details and schedule it.
Adding a customer
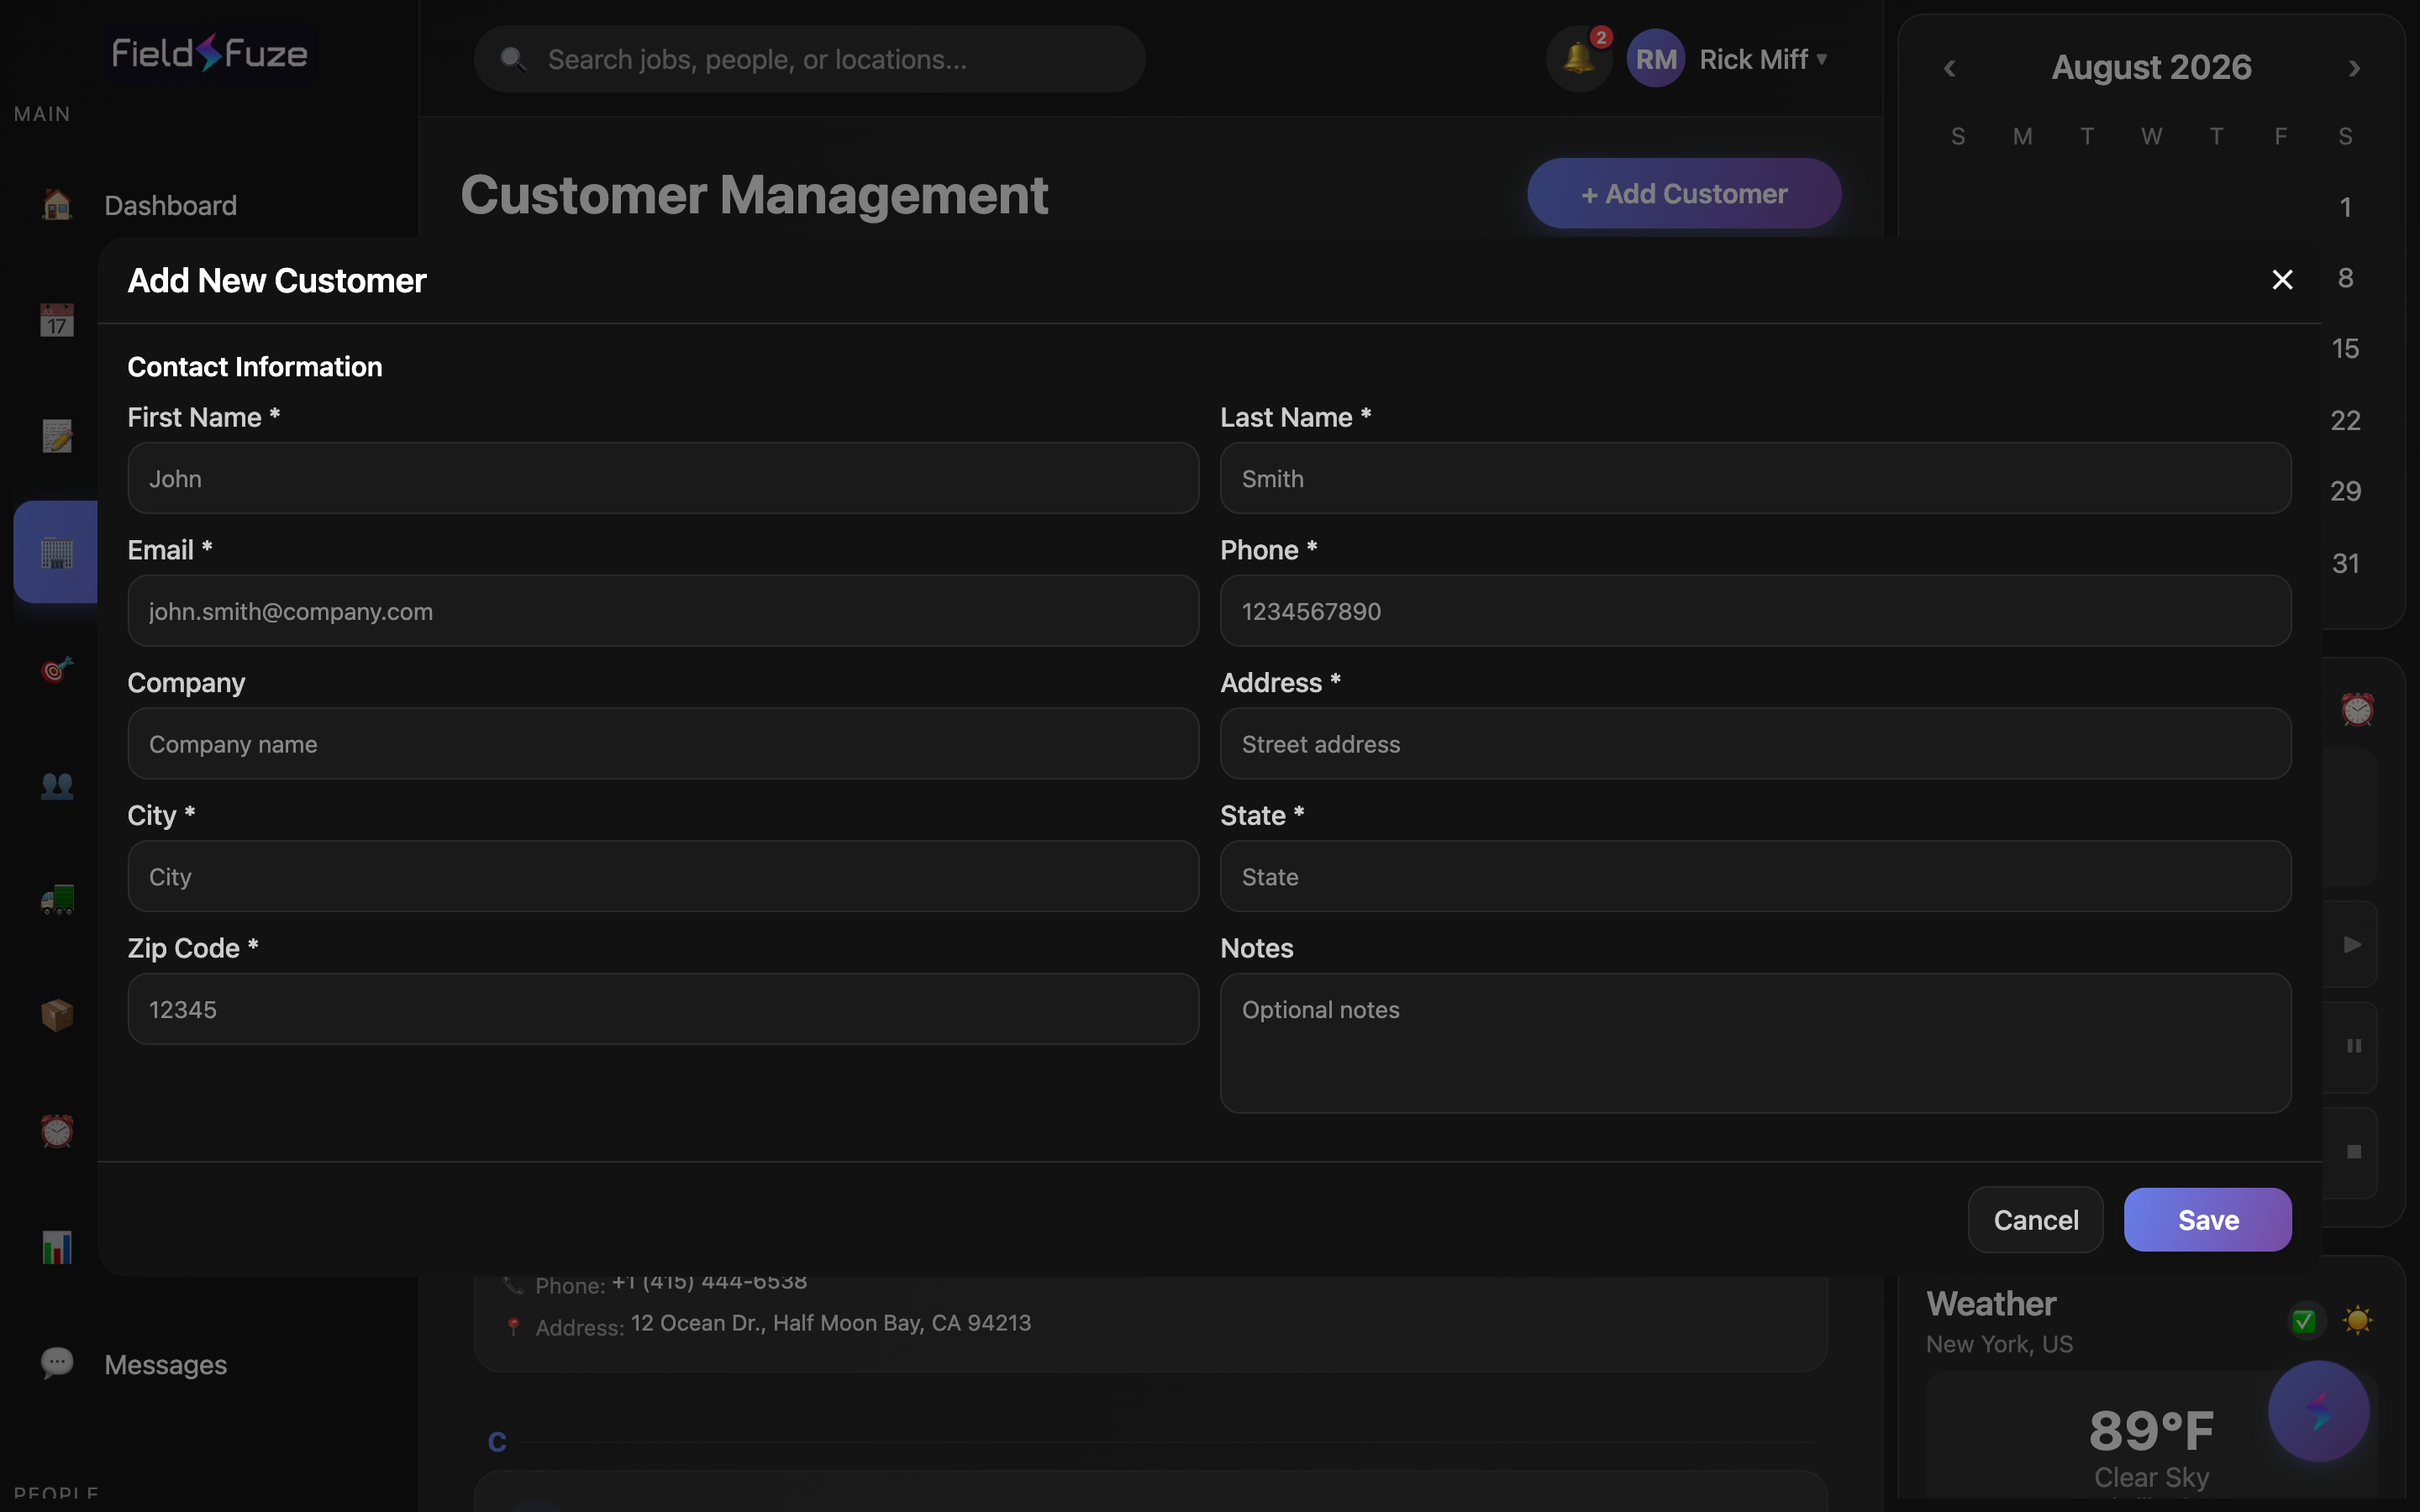
Add a new customer anytime with + Add Customer. FieldFuze guides you with clear inline hints so records land complete and consistent — which keeps search sharp and jobs easy to book later.
Fill the form
- Click + Add Customer.
- Enter the required details — First Name, Last Name, Email, Phone, and the full Address, City, State, and Zip.
- Optionally add a Company and Notes.
- Click Save — the new customer appears in the directory right away.
- First Name and Last Name — required.
- Email — required, checked for a valid address format.
- Phone — required; enter the 10-digit number and it formats as you type.
- Address, City, State, Zip — required; Zip is a 5-digit code.
- Company — optional, ideal for commercial accounts.
- Notes — optional, for anything worth remembering about this customer.
If a field needs attention, FieldFuze points it out right on the form and keeps everything you've typed — fix the one field and Save. Nothing is lost.
Duplicate detection and Create Anyway
FieldFuze automatically watches for possible duplicates as you save, so your directory stays clean and every job attaches to the right person. If a new entry looks like someone you already have, you'll get a friendly heads-up explaining the match.
- Smart match — the moment a save looks like an existing customer, FieldFuze pauses and tells you why.
- Create Anyway — when it really is a different person (a namesake, a second property, a family member), one click confirms and creates the new record.
Texting and SMS opt-in
FieldFuze makes it easy to text customers the right way. Request their opt-in, then message them about appointments, on-my-way alerts, and follow-ups — all from the profile.
Request SMS opt-in
The SMS Opt-In section shows the customer's current status at a glance — Opted In (green), Pending (amber), or Not Requested — along with the relevant dates.
- Open the customer with a phone number on file.
- Click Send Opt-In Request — you'll confirm you have the customer's consent to text them.
- FieldFuze texts the customer to confirm their opt-in and marks the status Pending until they reply; you can Resend Opt-In Request anytime.
The opt-in flow captures the customer's confirmation and records the date they opted in, so your texting stays consent-based and above board. Once they're opted in, you're clear to message them.
View Texts
Click View Texts to jump straight from the customer profile into their conversation in Messages — no searching for the thread. Reply, review past texts, and keep the relationship moving from one place.
Sales credit — "Sold By"
FieldFuze tracks who won each customer, so your team gets credit and your reporting is accurate. The rep (or reps) credited on the customer flow through to that customer's jobs and revenue.
- Sold By — see who's credited for the customer right on the profile.
- Team-selling splits — when more than one rep is credited, each rep's share percentage is shown.
Set or correct sales credit
If your role includes managing sales credit, a Sales Credit editor lets you set or adjust who a customer is attributed to — perfect for walk-ins, retroactive credit, or splitting a team-sold deal.
- Open the customer and find Sales Credit.
- Choose the primary rep who sold the customer, and add any assisting reps.
- Set each rep's share so the split totals 100%, then Save — the credit denormalizes to the customer's jobs automatically.
Sales credit set here rides Lead → Customer → Job → revenue, so the reps who earned a deal are credited everywhere it counts — from this profile through billing and reporting.
Ways teams use it
- Prep for a call — search a name, open the profile, and see contact info, past jobs, balances, and notes before you dial.
- Book repeat work fast — open a returning customer and hit + Add Job; the address is already there.
- Chase a balance — spot amber "due" tiles in Job History, then View Texts to send a friendly reminder.
- Grow recurring revenue — check the recurring badge to see each customer's monthly value at a glance.
- Keep the list clean — let duplicate detection catch near-matches, and use Create Anyway when it's genuinely a new person.
- Reward the team — attribute walk-ins and split team-sold deals so credit lands with the right reps.
Team members with focused access see the customers tied to their assigned jobs, so their directory stays relevant to the work in front of them. A customer's total revenue is shown to owners and managers whose role includes full revenue visibility.